What to expect
- 10 hours of instruction, professionally filmed and edited
- 46 chapters of in-depth explanation and demonstration of how to deal with cracks, shown on 4 different scenarios
- Detailed instruction on the cleaning, gluing, filling, retouching and securing of the cracks
- A 15-page PDF file of materials used on the course and their suppliers
- English captions are available throughout
- Each of the 46 lectures/videos has a comment section where you can ask questions and start a conversation with myself and other users
- Unlimited anytime access to this course on Teachable once purchased (the course is not downloadable)
- Upon completion of the course you will be issued with a certificate
Course Content
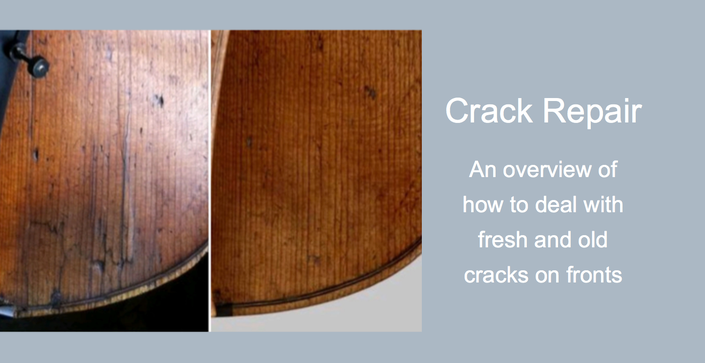
This is a 10 hour course comprising 46 chapters where I walk you through the process of dealing with cracks on 4 different scenarios, including 3 cracks on a violin front, a violin rib crack, a wormtrack on a cello front and cracks in the chinrest area of a violin front that needed improving just from the outside.
I explain and demonstrate the process of decision making on whether or not to open up a crack, the cleaning and gluing of the cracks and using wood filler or shavings if required, the importance and use of filler varnish as well as the retouching and finishing process and securing the cracks on the inside of the instruments.
Included in this course is a 15-page PDF file with a comprehensive list of the materials I use during the course and their suppliers.

Treble Side F-hole Wing Crack
Wing cracks are one of the most common cracks we encounter and have to deal with on a regular basis. On this course I show each step of how to get from A to B repairing this wing crack.

Upper Bout Front Crack
This upper bout crack ran along the whole length of the upper bout, from the C-edge to the top of the plate. The lower part of the crack had quite a gap along it. On the course, I show how I dealt with this scenario.

Cracks In Chinrest Area
On the course, I show how the look of some cracks can be improved from the outside without the front being removed.

Upper Bout Rib Crack
This slab-cut rib crack was tricky to deal with. I walk you through the process of cleaning, stabilising, gluing, filling, retouching and securing this crack.

Bass Side F-Hole Wing Crack
This bass side wing crack is another good example of showing the cleaning, gluing, filling and retouching of a crack.

Worm Track On Cello Front
In this scenario, I demonstrate how to deal with a wormtrack using wood shavings to cover the area for the best visual outcome.
Online Course on Crack Repair
- 1. Introduction and estimates for 4 different scenarios of crack repair (18:19)
- 2. Deciding on the approach and opening up some of the cracks (25:55)
- 3. Cleaning of cracks on violin front and rib (20:00)
- 4. Cleaning of cracks from the outside only (23:50)
- 5. Gluing and clamping of cracks (15:59)
- 6. Using Scotchlite as a wood filler (11:39)
- 7. Cleaning the rib crack and making a counter part form for the rib (17:16)
- 8. Application of filler varnish onto chinrest area (7:55)
- 9. Preparation for gluing of cracks continued on front (16:39)
- 10. Clamping the rib dry overnight in counter form (3:38)
- 11. Second application of filler varnish onto chinrest area (2:20)
- 12. Removal of old retouch on rib (11:00)
- 13. Gluing the rib crack (4:10)
- 14. Gluing the crack in the upper bout of the front (5:48)
- 15. Cleaning out the wormtrack on the cello (14:33)
- 16. Work on upper bout crack of front continued and re-gluing of wing crack (13:02)
- 17. Explanation of how to create texture and scraping of filler varnish on chinrest area (17:30)
- 18. Securing the rib crack (14:17)
- 19. Gluing upper part of crack on front and application of Deft and Scotchlite filler onto cracks of front (14:36)
- 20. Application of Scotchlite Filler and Deft onto rib crack (6:57)
- 21. Application of filler varnish onto cracks of front (3:36)
- 22. Preparation of wormtrack area to receive shavings (14:18)
- 23. Scraping the Deft on the rib crack (5:16)
- 24. Preparation and gluing of the 1st shaving over the wormtrack (7:34)
- 25. Removal of temporary studs and scraping of Deft on the Degani front (14:34)
- 26. Preparation and gluing of the 2nd shaving over the wormtrack (22:20)
- 27. Explanation of staining new wood with chemicals and scraping the shavings (10:24)
- 28. Explanation of materials and method of retouching (9:52)
- 29. Application of chemicals onto shavings (2:57)
- 30. Retouching of f-hole wing cracks on Degani front (19:58)
- 31. Retouching of upper bout crack on Degani front (30:55)
- 32. Application of water stain onto shavings and tidying up of the area inside the purfling (12:42)
- 33. 2nd application of Scotchlite filler on Degani front (4:20)
- 34. Application of Deft over the shavings (1:35)
- 35. Recap and retouching of crack on Degani front in upper bout (21:07)
- 36. Retouching of rib crack (32:05)
- 37. Retouching of the chinrest area (26:14)
- 38. Retouching of the shavings (14:09)
- 39. Explanation about securing the cracks in all 4 scenarios and about studs in general (10:37)
- 40. Preparation, fitting, gluing and shaping of the studs (31:21)
- 41. Recap of work carried out on all 4 instruments to date (8:19)
- 42. Finishing of the areas of repair on the Degani front including application of patina (14:34)
- 43. Finishing the chinrest area of the Camilli including application of patina (5:41)
- 44. Finishing of the rib area (3:29)
- 45. Finishing the area of the shavings (3:39)
- 46. Final conclusion (1:49)
Crack Repair Course
"Gluing cracks is a regular and important part of maintaining instruments of the violin family but the correct procedures for repairing them can sometimes be overlooked. This course is therefore most welcome as it demonstrates every stage involved in dealing with several commonly encountered crack repairs. Through Evie Troy's excellent and unobtrusive videography, the viewer is guided through the initial assessment before embarking on cleaning, gluing, filling and reinforcing the cracks, before concluding with retouching. All is clearly explained and skilfully demonstrated as might be expected after the success of Iris's previous neck graft course."
Andrew Fairfax
Violin Maker and Restorer
"This online course is a most welcome follow-up on the pioneering neck graft instructions which Iris Carr released a year ago. I find it amazing to be invited into Iris Carr’s workshop and learn from one of the world’s leading violin restorers! I particularly enjoy how Iris Carr constantly discusses the situation with herself while explaining her actions and consequences of the techniques being used. While viewing the problem from different angles, she demonstrates that high end restoration is all about skill, experience and a huge amount of good taste! The filming by Evie Troy also deserves high honours. The clarity of colours, the sharp images and the extreme close-up videography is – like the work of Iris – very tastefully done, with the utmost care and skill. The quiet pace and progress of the filming really takes the stress out of the situation – which in turn ensures a better forum for a learning process!
In short, this course in crack repair is amazing and Iris Carr has done it again!"
Jens Stenz
Violin Maker
"Iris Carr's course on crack repair and retouching is a thorough examination of her techniques and methodology. It takes the viewer along for the process on several projects, all presented logically while being beautifully shot and edited. It's sure to become a staple in repair resources for years to come!"
Jerry Lynn, Violin Restorer
Available Courses
Pricing inclusive of VAT
There is no VAT charged for businesses outside the EU and business entities from European contries other than the UK with a valid VAT ID. Please enter your VAT ID on the checkout page in the address section.
The Violin Neck Graft Course consists of Part 1 & 2 which can be purchased separately. There is a discount if both are purchased together. There is also the option of paying in installments over 6 months.
Terms and Conditions
Iris Carr Restorations Ltd is not liable for any personal injury, loss or damage caused by the use of tools or chemicals demonstrated on any course, nor for loss or damage done to any instrument by following the instructions in the videos.
The chapters/videos are protected by Copyright. They are not downloadable and can only be viewed on Teachable. Copying, and/or distributing any content of this course or sharing of log-in details are not permitted and multiple sharing of log-in details will be detected by this site.
Once a course has been purchased, there will be no refund given unless there is a ligitimate reason for that request.
For more details, please see Terms of Use.


